
Flask Example: Webpage Enriched By AI Text & Image Models
In this post, we’re going to make a simple Flask example and demonstrate how to run a webpage using Python. Furthermore, we’ll look into some basic functionality that Jinja offers, which is what Flask uses on the frontend.
Basically, we’re going to expand upon the Hello World application and throw some AI generated content into the mix. If you’re looking to learn Flask, I’d say the best way to do it is to use it in simple projects like this one here.
To clarify what exactly we’re going to do is instead of using a HTML template that displays just Hello World, we’re going to work on a free Bootstrap template. This way we won’t need to style it, we’ll just strip away sections we won’t need.
We’re also going to use OpenAI’s GPT Turbo 3.5 model to generate text content for our menu section. Along with that we’ll utilize Stability AI text-to-image model to generate the images of the dishes. With all this content, we’ll use for loops, if statements, and variables on the frontend with Jinja tags.
Prerequisites
Before, we get to the coding part of this example, you’ll need to install a few Python modules. Along with Flask module, which is going to be heart of this project, you’ll need to install Langchain and Stability-sdk.
You can take care of this part by using the following pip commands.
pip install Flask
pip install langchain
pip install langchain-openai
pip install pillow
pip install stability-sdk
You do need to keep in mind that both OpenAI and Stability AI API’s aren’t free. In order to use these APIs you’ll also need to create an account on both, OpenAI and Stability AI websites.
Coding the project
Like with any other Python project we do here, we first need to import all the necessary modules and tools. However, we’re going to do things a little differently, since this project is a little more complex than the others. We’re going to explain the role each module plays here separately.
import os
import json
from dotenv import load_dotenv
from flask import Flask, render_template

from langchain.output_parsers import ResponseSchema, StructuredOutputParser
from langchain.prompts import PromptTemplate
from langchain_openai import ChatOpenAI

import io
from PIL import Image
from stability_sdk import client
import stability_sdk.interfaces.gooseai.generation.generation_pb2 as generation
Furthermore, we’re going to set a couple of constants, which we’ll need later when we’re generating content with the APIs.
load_dotenv()
ROOT = os.path.dirname(__file__)
MENU_IMAGES_DIR = os.path.join('img', 'menu')
STABILITY_KEY = os.getenv('STABILITY_KEY')
DATA = os.path.join(ROOT, 'data.json')
os.environ['STABILITY_HOST'] = 'grpc.stability.ai:443'
os.environ['STABILITY_KEY'] = STABILITY_KEY
The load_dotenv() method at the top loads the .env file, which contains the API keys.
Part 1: Flask example
In order to make it more understandable, I’ll strip all the unnecessary parts of the code and leave in only the part that make the Flask application work. In our project we’re going to use Flask to render one HTML file in the browser, and barebones of this looks something like the following.
from flask import Flask, render_template

app = Flask(__name__)

@app.route('/')
def home():

    return render_template('index.html')
Flask also has a predetermined name of the folders from which it takes all the files that are necessary for the browser. Furthermore, the name of these folders are static (used for static files like CSS, JS, images) and templates (used for HTML files – Jinja templates).
Moreover, these folders need to be in the same directory as the application file.
In order to run the application, you’ll need to navigate to the project folder in the terminal and execute the following command.
flask --app application_file_name run
Or if you name your flask aplication file app.py, you can simply run without the ‘–app’ parameter, since app is the default name, by which Flask recognizes the app file. In that case, the following command should work just fine.
flask run
Since we use the render_template() method in this barebones example, we still need to create the templates folder and the ‘index.html’ file inside it. You can also name your template files whatever you like, just make sure you point to the right file name in the application file.
Part 2: Jinja template
Now that we’re moving on the frontend of our application, I’ll assume that you’re already familiar with how HTML, CSS and JavaScript works. Furthermore, we’re going to focus on how to setup a free Bootstrap template as a Jinja template.
For this Flask example project, I’ve chosen Yummy – Bootstrap Restaurant Website Template. The very first part of the template we need to change are the file paths. This is also going to be the first instance where we’ll utilize the Jinja syntax.
Furthermore, we’ll need to copy the assets from the template files into the static folder of our application. The following line demonstrates how to import Bootstrap CSS file.
<link href="{{ url_for('static', filename='/vendor/bootstrap/css/bootstrap.min.css') }}" rel="stylesheet">As you can see, the path is defined inside a double curly brackets within a url_for() method. Moreover, the first parameter references the static folder and the second, named filename, references the relative path to the file within static folder.
You’ll need to do this for all other files, which includes JS, CSS, and images. This will make the page appear like the downloaded template. However, for the purpose of this tutorial, we’re only going to focus on the menu section of the page later when we start generating content with AI.
Part 3: Generating content with AI
Now let’s get to the juicy part, where we actually build the methods that will generate text and images for our menu.
def generate_menu_items(menu_type):
    response_schemas = [
        ResponseSchema(
            name='dish titles',
            description='List of 6 dishes that are made out of potatoes'
        ),
        ResponseSchema(
            name='ingredients',
            description='Python list of 5 main ingredients for each dish'
        ),
        ResponseSchema(
            name='image prompts',
            description='List of prompts for image generating model for dishes'
        ),
        ResponseSchema(
            name='prices',
            description='List of dish prices in US dollars'
        )
    ]

    output_parser = StructuredOutputParser.from_response_schemas(response_schemas)

    format_instructions = output_parser.get_format_instructions()
    prompt = PromptTemplate(
        template='Give me information about the following dishes that we could put on a {menu_type} menu\n{format_instructions}',
        input_variables=['menu_type'],
        partial_variables={'format_instructions': format_instructions}
    )

    model = ChatOpenAI(temperature=0)
    chain = prompt | model | output_parser

    output = chain.invoke({'menu_type': menu_type})
    return output

def generate_menu_item_image(prompt, img_title):
    stability_api = client.StabilityInference(
        key=STABILITY_KEY,
        verbose=False,
        engine='stable-diffusion-xl-1024-v1-0'
    )

    output = stability_api.generate(prompt=prompt)
    output_path = os.path.join(MENU_IMAGES_DIR, img_title + '.png')

    for r in output:
        for artifact in r.artifacts:
            if artifact.type == generation.ARTIFACT_IMAGE:
                img = Image.open(io.BytesIO(artifact.binary))
                img.save(os.path.join(ROOT, 'static', output_path))

    return output_path
Next, we need to parse this information, so we can send it all to the template later.
def get_menu_data():
    menu = {}
    menu_types = [
        'starters',
        'breakfast',
        'lunch',
        'dinner'
    ]

    data = load_data()
    if data and 'menu' in data:
        menu = data['menu']
    else:
        for m in menu_types:
            output = generate_menu_items(m)
            if len(output['dish titles']) == len(output['ingredients']):
                menu['menu-' + m] = {}
                menu['menu-' + m]['name'] = m.capitalize()
                menu['menu-' + m]['data'] = []

                for d in range(len(output['dish titles'])):
                    dish_title = output['dish titles'][d]
                    img_path = generate_menu_item_image(output['image prompts'][d], f"{m}-{d}")
                    menu['menu-' + m]['data'].append({
                        'dish': dish_title,
                        'ingredients': ', '.join(output['ingredients'][d]),
                        'img': img_path,
                        'price': output['prices'][d]
                    })

        if data:
            data['menu'] = menu
        else:
            data = {
                'menu': menu
            }
        save_data(data)

    return menu
You probably noticed that we use a couple of methods we haven’t mentioned yet. I’m talking about load_data() and save_data(). These will store the generated data into a json file, so our application doesn’t generate new data everytime we refresh the page.
def load_data():
    try:
        with open(DATA, 'r') as data_file:
            data = json.load(data_file)
            return data
    except:
        return

def save_data(data):
    with open(DATA, 'w') as data_file:
        json.dump(data, data_file, indent=4)
And lastly, we’ll modify our home method that calls the render_template() method to render HTML from the Jinja template. Here we’ll fetch the data and send it to the template.
@app.route('/')
def home():
    menu = get_menu_data()
    return render_template('index.html', menu=menu)
Part 4: Modifying Jinja template
For the last part, we’ll use Jinja tags inside the template and input the data we sent through the argument.
<!-- ======= Menu Section ======= -->
<section id="menu" class="menu">
    <div class="container" data-aos="fade-up">

        <div class="section-header">
            <h2>Potato Menu</h2>
            <p>Check This <span>Potato Menu</span></p>
        </div>

        <ul class="nav nav-tabs d-flex justify-content-center" data-aos="fade-up" data-aos-delay="200">
            {% for m in menu %}
            <li class="nav-item">
                <a class="nav-link {% if m == 'menu-starters' %}active show{% endif %}" data-bs-toggle="tab" data-bs-target="#{{ m }}">
                    <h4>{{ menu[m]['name'] }}</h4>
                </a>
            </li><!-- End tab nav item -->
            {% endfor %}

        </ul>

        <div class="tab-content" data-aos="fade-up" data-aos-delay="300">

            {% for m in menu %}
            <div class="tab-pane fade {% if m == 'menu-starters' %}active show{% endif %}" id="{{ m }}">
                <div class="tab-header text-center">
                    <p>Menu</p>
                    <h3>{{ menu[m]['name'] }}</h3>
                </div>
                <div class="row gy-5">
                    {% for item in menu[m]['data'] %}
                    <div class="col-lg-4 menu-item">
                        <a href="" class="glightbox">
                            <img src="{{ url_for('static', filename=item['img']) }}" class="menu-img img-fluid" alt="">
                        </a>
                        <h4>{{ item['dish'] }}</h4>
                        <p class="ingredients">
                            {{ item['ingredients'] }}
                        </p>
                        <p class="price">
                            {{ item['price'] }}
                        </p>
                    </div><!-- Menu Item -->
                    {% endfor %}
                </div>
            </div>
            {% endfor %}

        </div>

    </div>
</section><!-- End Menu Section -->
You can compare this part of the code with the downloaded template file. You can see that for loops and if statements make this way more efficient.
And what I ended up with is the following.
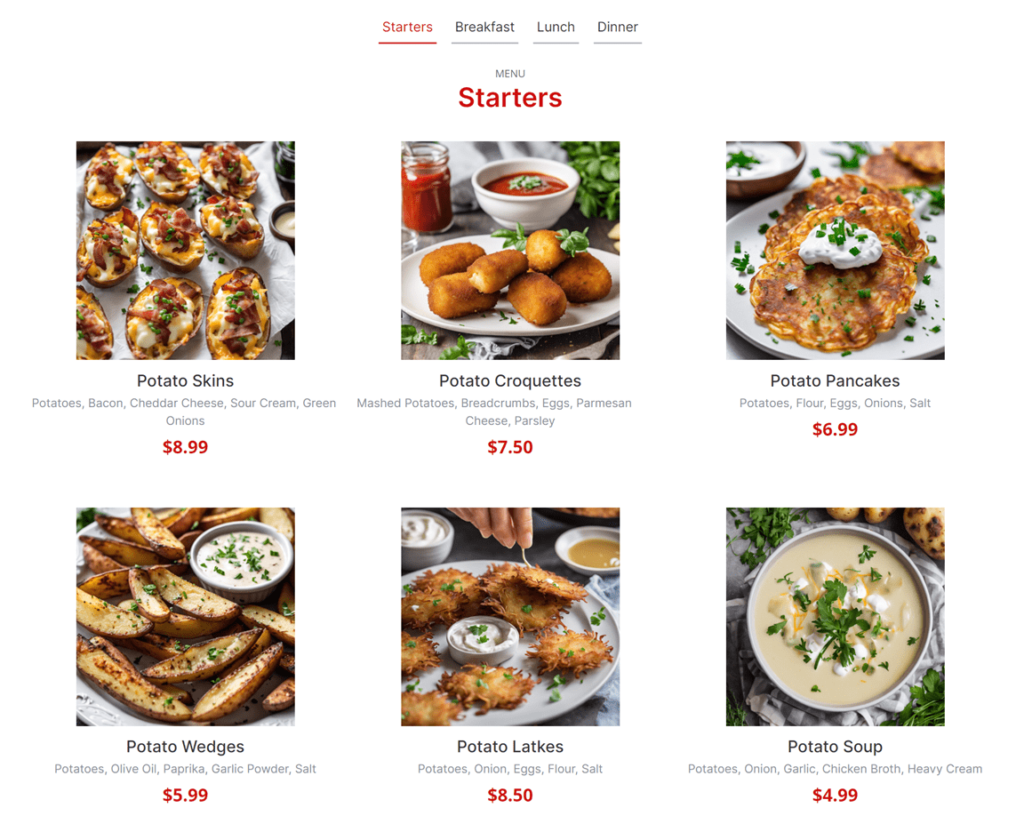
Alright! Looks pretty cool, considering it was all made by an AI.
Entire code of the Flask example project
Here are the entire contents of the Flask application file (app.py). Moreover, I’m also including the GitHub repository link, where you can find the whole project.
import os
import json
from dotenv import load_dotenv
from flask import Flask, render_template

from langchain.output_parsers import ResponseSchema, StructuredOutputParser
from langchain.prompts import PromptTemplate
from langchain_openai import ChatOpenAI

import io
from PIL import Image
from stability_sdk import client
import stability_sdk.interfaces.gooseai.generation.generation_pb2 as generation

load_dotenv()
ROOT = os.path.dirname(__file__)
MENU_IMAGES_DIR = os.path.join('img', 'menu')
STABILITY_KEY = os.getenv('STABILITY_KEY')
DATA = os.path.join(ROOT, 'data.json')
os.environ['STABILITY_HOST'] = 'grpc.stability.ai:443'
os.environ['STABILITY_KEY'] = STABILITY_KEY

def load_data():
    try:
        with open(DATA, 'r') as data_file:
            data = json.load(data_file)
            return data
    except:
        return

def save_data(data):
    with open(DATA, 'w') as data_file:
        json.dump(data, data_file, indent=4)

def generate_menu_items(menu_type):
    response_schemas = [
        ResponseSchema(
            name='dish titles',
            description='List of 6 dishes that are made out of potatoes'
        ),
        ResponseSchema(
            name='ingredients',
            description='Python list of 5 main ingredients for each dish'
        ),
        ResponseSchema(
            name='image prompts',
            description='List of prompts for image generating model for dishes'
        ),
        ResponseSchema(
            name='prices',
            description='List of dish prices in US dollars'
        )
    ]

    output_parser = StructuredOutputParser.from_response_schemas(response_schemas)

    format_instructions = output_parser.get_format_instructions()
    prompt = PromptTemplate(
        template='Give me information about the following dishes that we could put on a {menu_type} menu\n{format_instructions}',
        input_variables=['menu_type'],
        partial_variables={'format_instructions': format_instructions}
    )

    model = ChatOpenAI(temperature=0)
    chain = prompt | model | output_parser

    output = chain.invoke({'menu_type': menu_type})
    return output

def generate_menu_item_image(prompt, img_title):
    stability_api = client.StabilityInference(
        key=STABILITY_KEY,
        verbose=False,
        engine='stable-diffusion-xl-1024-v1-0'
    )

    output = stability_api.generate(prompt=prompt)
    output_path = os.path.join(MENU_IMAGES_DIR, img_title + '.png')

    for r in output:
        for artifact in r.artifacts:
            if artifact.type == generation.ARTIFACT_IMAGE:
                img = Image.open(io.BytesIO(artifact.binary))
                img.save(os.path.join(ROOT, 'static', output_path))

    return output_path

def get_menu_data():
    menu = {}
    menu_types = [
        'starters',
        'breakfast',
        'lunch',
        'dinner'
    ]

    data = load_data()
    if data and 'menu' in data:
        menu = data['menu']
    else:
        for m in menu_types:
            output = generate_menu_items(m)
            if len(output['dish titles']) == len(output['ingredients']):
                menu['menu-' + m] = {}
                menu['menu-' + m]['name'] = m.capitalize()
                menu['menu-' + m]['data'] = []

                for d in range(len(output['dish titles'])):
                    dish_title = output['dish titles'][d]
                    img_path = generate_menu_item_image(output['image prompts'][d], f"{m}-{d}")
                    menu['menu-' + m]['data'].append({
                        'dish': dish_title,
                        'ingredients': ', '.join(output['ingredients'][d]),
                        'img': img_path,
                        'price': output['prices'][d]
                    })

        if data:
            data['menu'] = menu
        else:
            data = {
                'menu': menu
            }
        save_data(data)

    return menu

app = Flask(__name__)

@app.route('/')
def home():
    menu = get_menu_data()
    return render_template('index.html', menu=menu)
Conclusion
To conclude, we made a simple Flask example project, where we basically took the Hello World part to the next level. Moreover, I learned a lot while working on this project and I hope you’ll find it useful as well.