How To Make Pictures Look Trippy With DeepDream
DeepDream is just another gem, born from Googles experiment to visualize patterns that a model’s layers learn. Furthermore, this algorithm over-interprets and enhances the patterns it sees in an image.
In other words, it can make images look trippy, or even disturbing sometimes. Thus, we’re going to implement it in python in a simple as possible way. Because, who doesn’t want a tool like that available at their fingertips.
Implementing DeepDream with Tensorflow
We’ll implement the following code in python using Googles Tensorflow machine learning library. We’re also going to use other libraries such as pillow for image processing.
So, first thing we need to do is import all the necessary libraries.
import tensorflow as tf
import numpy as np
import os
from PIL import Image
Now, we’ll set image path of the image we want to trippify.

root = os.path.dirname(__file__)
image_path = os.path.join(root, 'photo.jpg')
In the next step, we’ll define functions for preprocessing images, and for changing them back into an image format.
def load_image(image_path, max_dim=None):
    image = Image.open(image_path)

    if max_dim:
        image.thumbnail((max_dim, max_dim))

    return np.array(image)

def deprocess(image):
    image = 255 * (image + 1.0) / 2.0
    return tf.cast(image, tf.uint8)
Next, we need to define a function for calculating loss.
def calc_loss(image, model):
    image_batch = tf.expand_dims(image, axis=0)
    layer_activations = model(image_batch)

    if len(layer_activations) == 1:
        layer_activations = [layer_activations]

    losses = []
    for act in layer_activations:
        loss = tf.math.reduce_mean(act)
        losses.append(loss)

    return tf.reduce_sum(losses)
Now, we can define a class DeepDream. And once we call the object, it’ll output resulting image. In the following code block, we will only define it, but not use it yet. We still have to define one more function before we run it all.
class DeepDream(tf.Module):
    def __init__(self, model):
        self.model = model

    def __call__(self, image, steps, step_size):
        print("Tracing")
        loss = tf.constant(0.0)
        for step in range(steps):
            with tf.GradientTape() as tape:
                tape.watch(image)
                loss = calc_loss(image, self.model)

            gradients = tape.gradient(loss, image)
            gradients /= tf.math.reduce_std(gradients) + 1e-8

            image += gradients * step_size
            image = tf.clip_by_value(image, -1, 1)
            print(f"Step {step}, loss {loss}", end="\r")

        return image

base_model = tf.keras.applications.InceptionV3(include_top=False, weights='imagenet')
print(base_model.summary())
names = ['mixed3', 'mixed5']
layers = [base_model.get_layer(name).output for name in names]
dream_model = tf.keras.Model(inputs=base_model.input, outputs=layers)
deepdream = DeepDream(dream_model)
Okay, here we have the model ready for making some trippy pictures. However, we still need to define a function that will run the deep dream process.
def run_deep_dream(image, steps=100, step_size=0.01):
    image = tf.keras.applications.inception_v3.preprocess_input(image)
    image = tf.convert_to_tensor(image)
    step_size = tf.convert_to_tensor(step_size)
    image = deepdream(image, steps, tf.constant(step_size))
    result = deprocess(image)

    return result
Now, we’re finally ready to run it and save the resulting image from this process.
original_image = load_image(image_path=image_path, max_dim=512)
dream_image = run_deep_dream(image=original_image, steps=100, step_size=0.01)
dream_image = Image.fromarray(np.array(dream_image))
dream_image.save(os.path.join(root, 'dream.jpg'))
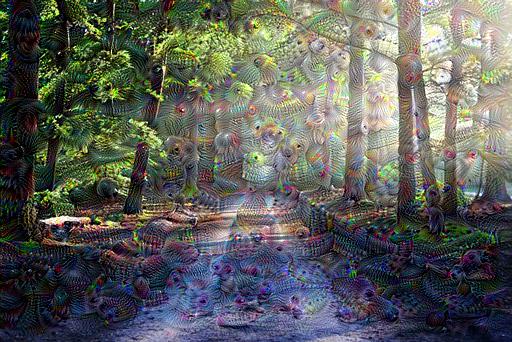
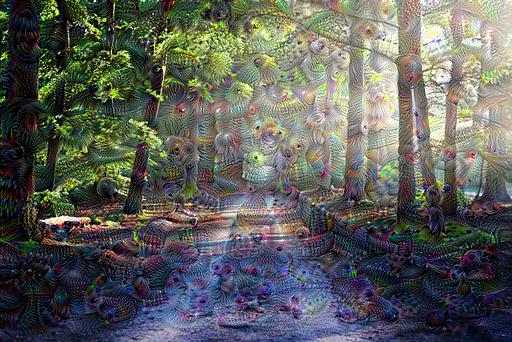
Following image is the resulting image we get once the algorithm finishes.

Conclusion
In conclusion, we demonstrated one of the simplest ways to implement DeepDream algorithm using Tensorflow. I hope this article helped you gain a better understanding what DeepDream is and how it works.
Now, it’s your turn to have some fun and make some trippy images, and share them with your friends.


